Figure 3.1: Configure the database I/O first.
Next: Exporting to OOo using MySQL, Previous: Interacting with word processors, Up: Interacting with word processors
This section describes how to export a database in a flat text file. Each entry will be on a separate line, with one field by column. Such file are often names CSV file (Coma Separated Value), because columns are separated by comas. Tabs or semi-columns are also frequently used.
Such Text/CSV file can be imported in OpenOffice(OOo) as a bibliography database. It may be convenient to export to OOo without using a database manager (DBM). However, flat file are less powerful than DBMs. The next section will describe how to use a DBM to export bibliographic data to OOo.
You first need to configure a few things. Go to the Options->Configure external database I/O to access the Database Configuration Dialog. From here, you can set up the way you want your bibliography to be exported. These settings are for database export, of which CSV export is a particular case.
It is possible to save your settings to a XML file for latter re-use. As a consequence, it is also possible to use a pre-defined configuration file. Two files for OOo export are downloadable from the website:
Got to the Export->Text/CSV menu, and choose the file where you want to export the data. The file must have the extension .txt or .csv to be recognized by OOo. An option dialog box appears, letting you set the characters to be used for delimiting columns and so on. Using tabulations to separate columns and double-quotes to delimit text is a reasonable choice.
This tutorial was done with OpenOffice 1.5.
OOo can import a database from a text file in CSV like format: a text file with columns.
First of all, you must create a new bibliography database in OpenOffice. Click on the Data Source menu item in the Tools menu. A dialog box then appears. Create a new source (Create new source button, in the upper left corner). Set the general option as in figure fig:OODataSource: set the database type to text, set the database name and the directory where it can be found. Then switch to the “text” tab and set the format of you file: .csv extension for instance, and {tab} delimiter. The next panel allows you to select the table you want to use. One table should appear for each .csv file in the directory you selected in the “general” panel.
For now, you have imported your B3 data as a database in OpenOffice. The next step is to tell OpenOffice that this database is the one where you can find references.
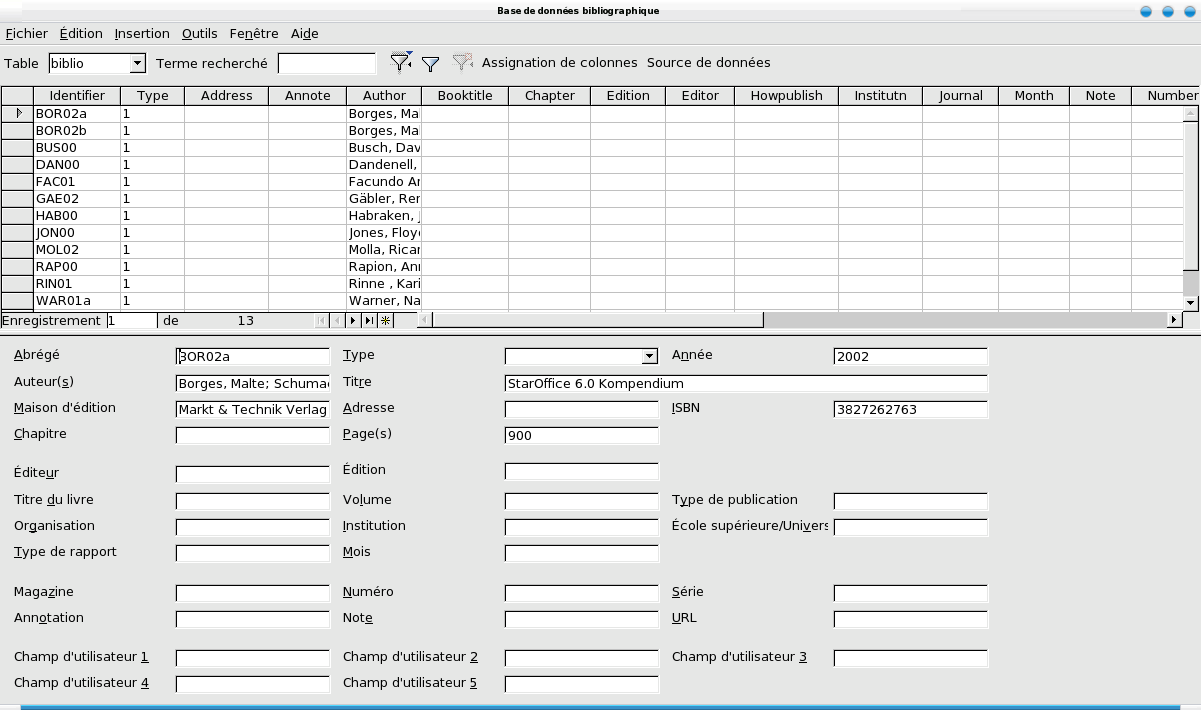
To change the bibliography database, jump to the tools menu and select the 'bibliography database' menu item (the one just above 'data source'). A new Window appears:
The database you see is the default database with references to OpenOffice books, or the last one you used (in this case, you need not reading more of this tutorial ;-). You must change to the new one you just created by clicking on the 'data source button' (the last button in the toolbar). Your database must appear in the list: just select it.
OpenOffice will now prompt you for the field assignation: answer 'yes' to the question in the dialog box. Another window appears:

Figure 3.4: This dialog box allows you to set up the correspondence between B3 fields and the table column names.
You can also display it with the column assignation button.
You may set something different, according to the fields you chose to export or else. If some fields are set to 'nothing', OpenOffice will prompt you again for column assignation. You can answer 'no' to the question, and it will work. Of course, you won't be able to use the corresponding field in the bibliography.
Here it ends! No you can insert reference as usual via the Insertion -> Index -> Bibliography entry menu. Bibliography management in OpenOffice is beyond the scope of this tutorial, so give a look at the OpenOffice help files for additional information.